
What Is Supabase?
Supabase is an open-source backend-as-a-service built on top of PostgreSQL. It bundles four major services under a single project:
- Database — a fully managed PostgreSQL instance with a built-in REST and GraphQL API, generated automatically from your schema
- Auth — user management with email/password, magic links, OAuth providers (Google, GitHub, etc.), and phone auth
- Storage — an S3-compatible file storage service with access policies tied to your database permissions
- Realtime — a WebSocket layer that lets clients subscribe to database changes as they happen
Unlike Firebase, which is a NoSQL document store, Supabase gives you a real relational database with foreign keys, joins, and full SQL power. That makes it a substantially better fit for the structured data most applications actually need.
When to Use Supabase
Supabase is a strong default choice for any full-stack application where you want a complete backend without managing your own infrastructure. It's particularly well-suited for:
- SaaS products that need multi-tenant data isolation via Row Level Security
- Applications with complex data relationships that benefit from SQL and joins
- Projects that need auth, database, and file storage from a single provider
- Prototypes and MVPs where speed of development matters more than custom infrastructure
The free tier (500 MB database, 1 GB storage, 50,000 monthly active users) is generous enough to take a project from zero to early revenue.
Step 1: Create a Supabase Project and Get Your Credentials
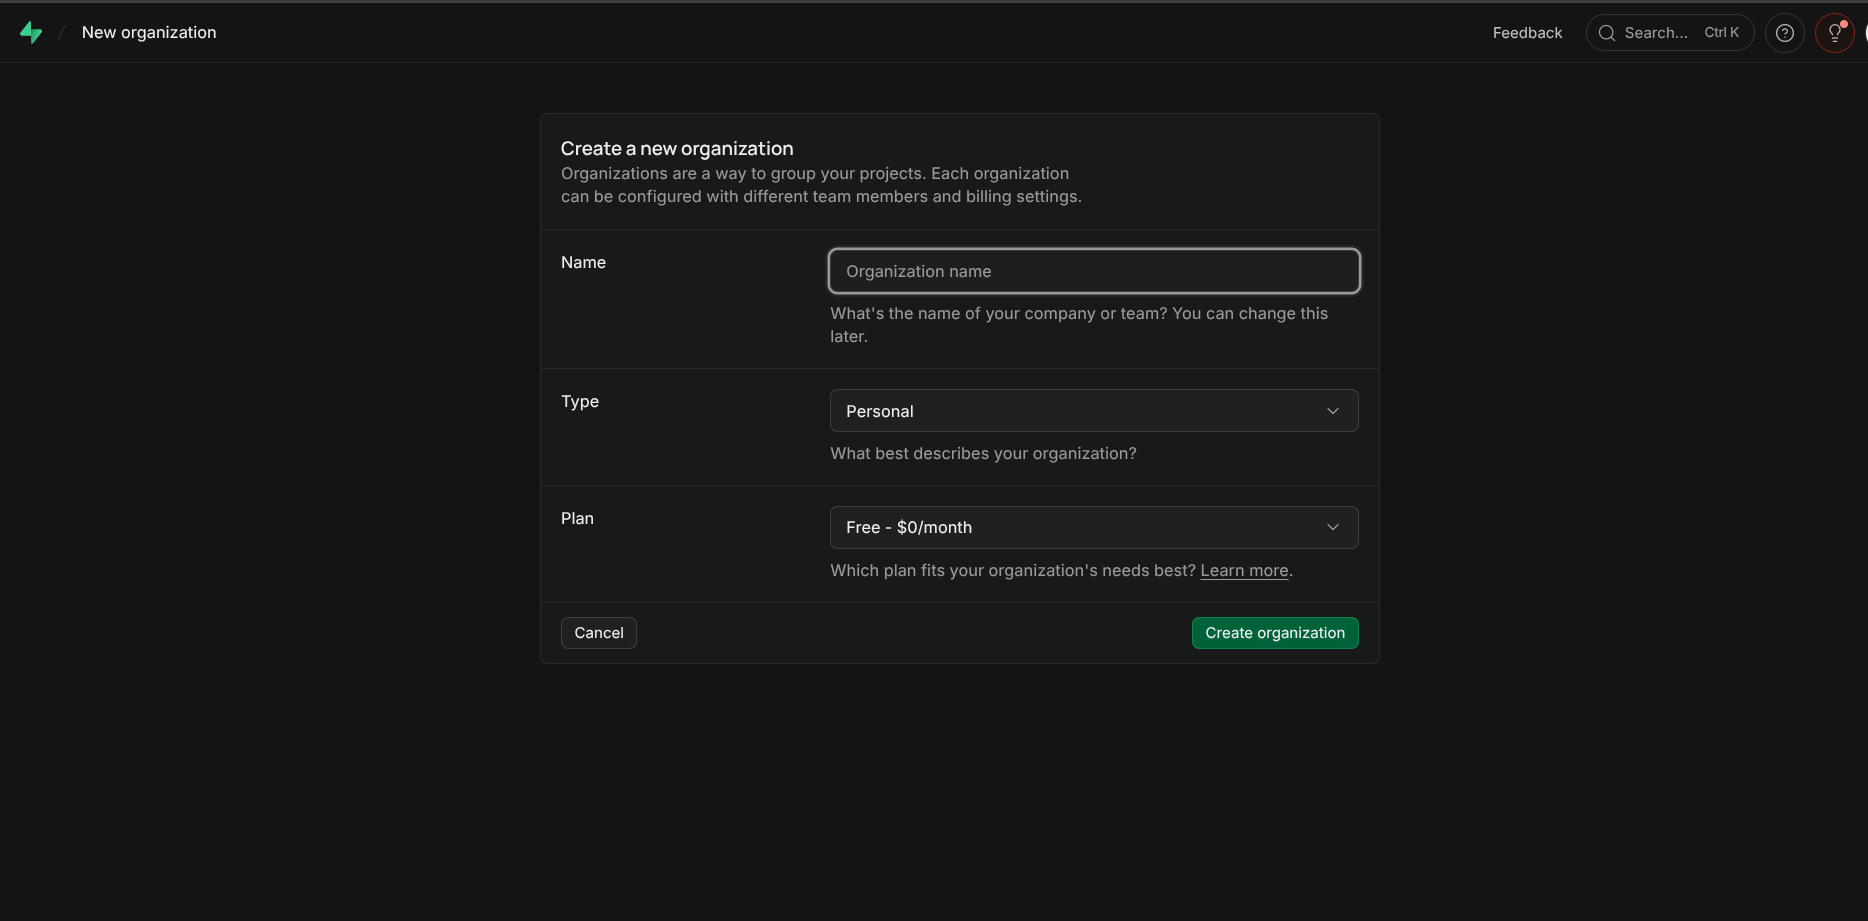
Go to supabase.com, sign in, and click New Project. Give it a name, choose a region close to your users, and set a strong database password (save this — you'll need it for direct Postgres connections).
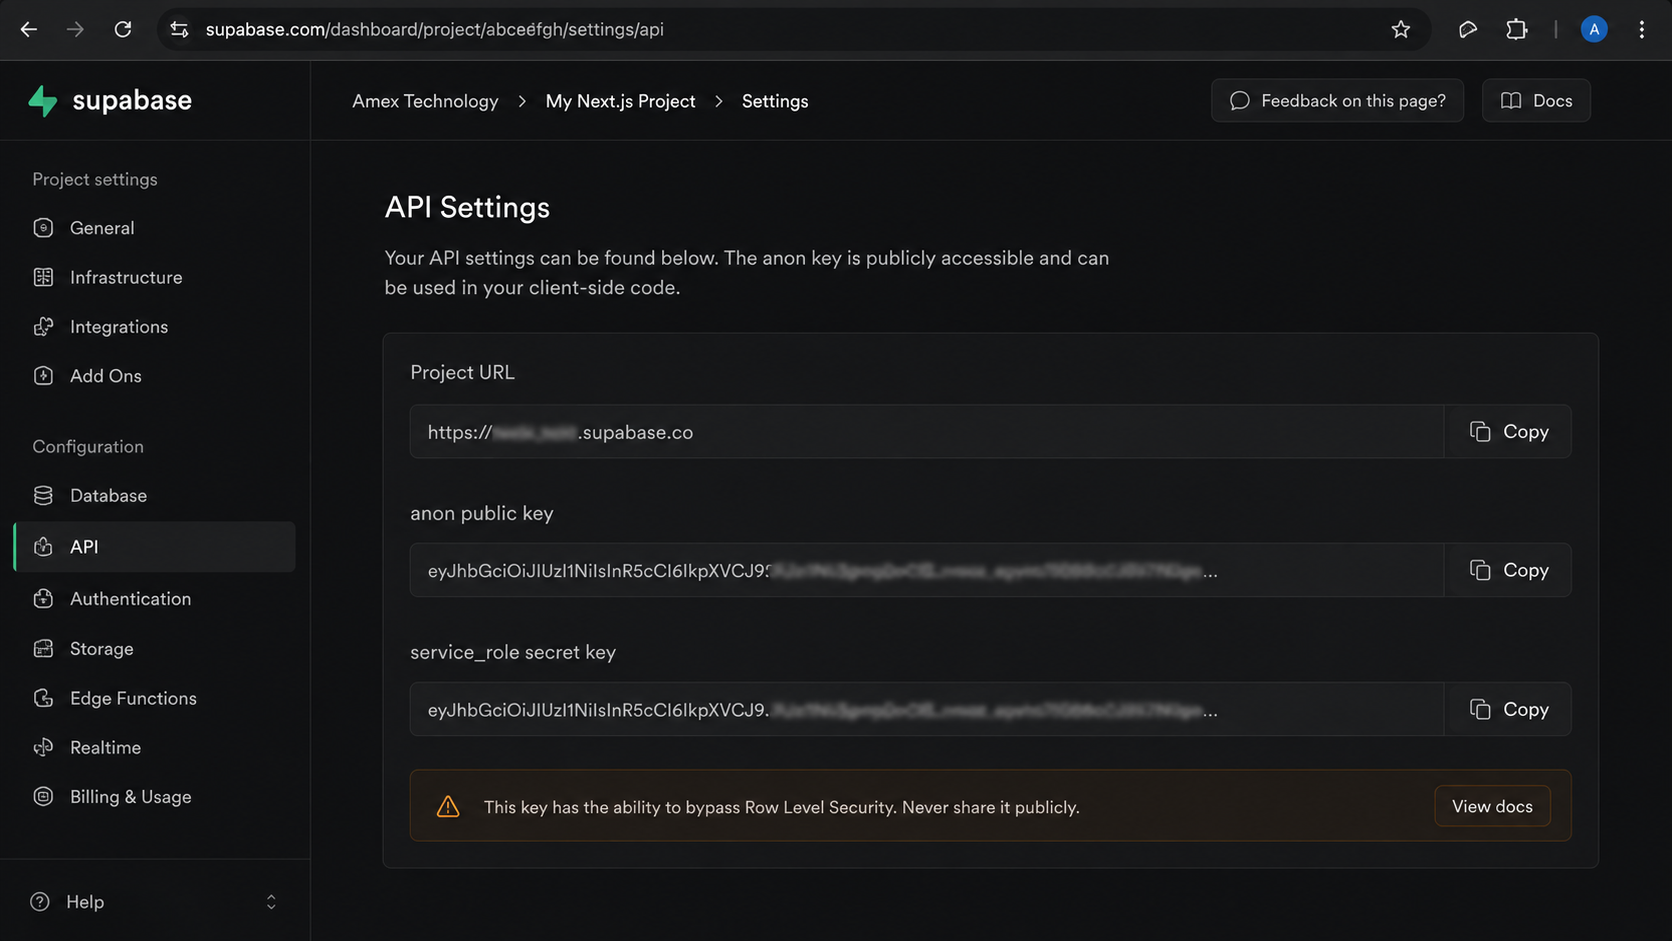
Once the project is provisioned (about 30 seconds), navigate to Settings → API. You'll find two values you need:
- Project URL — something like
https://abcdefgh.supabase.co - anon public key — a long JWT string. This is safe to use in client-side code as long as Row Level Security is enabled on your tables.
Keep the service_role key secret. It bypasses RLS entirely and should only be used in server-side code where you explicitly need admin access to the database.
Step 2: Install the SDK and Configure Environment Variables
npm install @supabase/supabase-js
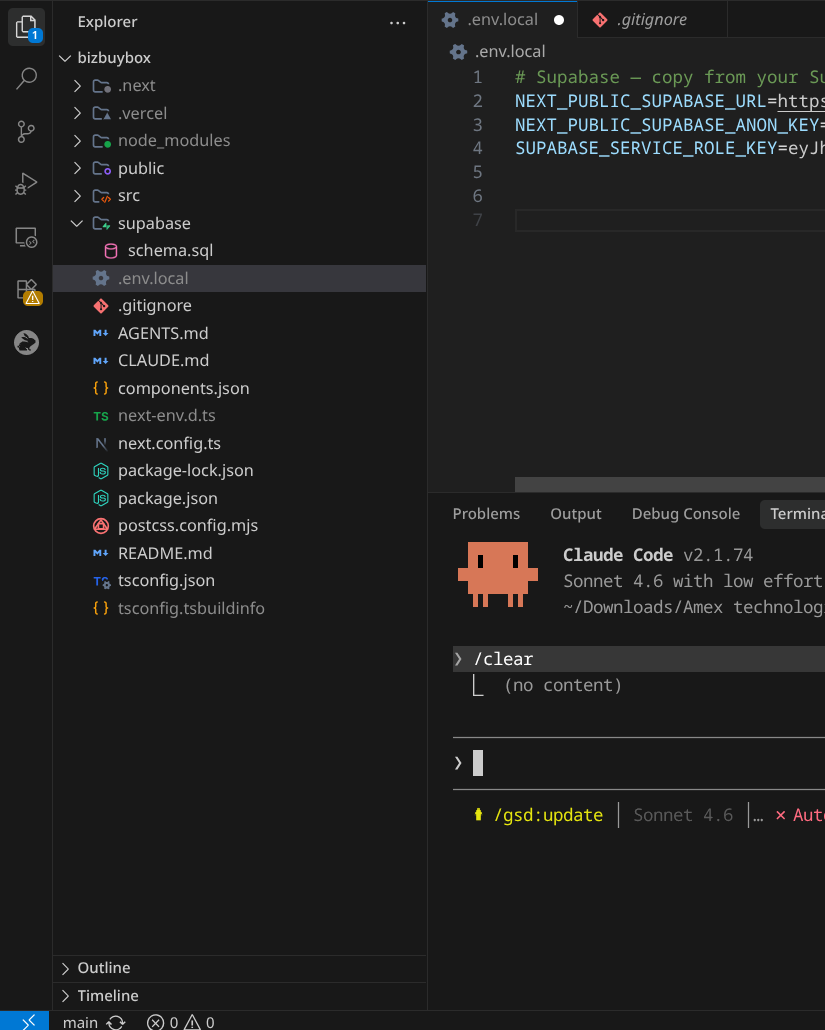
Create a .env.local file in your project root (add it to .gitignore if it isn't already):
NEXT_PUBLIC_SUPABASE_URL=https://abcdefgh.supabase.co
NEXT_PUBLIC_SUPABASE_ANON_KEY=your-anon-key-here
The NEXT_PUBLIC_ prefix exposes these variables to the browser bundle. The anon key is intentionally public — it's designed to be used in client-side code. Its permissions are limited by Row Level Security policies on your database tables.
Step 3: Initialize the Client
Create src/lib/supabase.ts:
import { createClient } from '@supabase/supabase-js';
const supabaseUrl = process.env.NEXT_PUBLIC_SUPABASE_URL!;
const supabaseAnonKey = process.env.NEXT_PUBLIC_SUPABASE_ANON_KEY!;
export const supabase = createClient(supabaseUrl, supabaseAnonKey);
Import this singleton wherever you need database or auth access. For plain React (Vite or Create React App) this single file is all you need. For Next.js App Router, you'll use a different setup covered below — but this client is still the right starting point for React-only projects.
Step 4: Database CRUD Operations
Supabase's query builder mirrors SQL closely. Here are the four essential operations.
Select (Read)
const { data, error } = await supabase
  .from('posts')
  .select('id, title, content, created_at')
  .order('created_at', { ascending: false })
  .limit(10);
Insert (Create)
const { data, error } = await supabase
  .from('posts')
  .insert({ title: 'My First Post', content: 'Hello world', user_id: userId })
  .select()
  .single();
The .select().single() chain returns the newly created row — useful when you need the auto-generated id.
Update
const { error } = await supabase
  .from('posts')
  .update({ title: 'Updated Title' })
  .eq('id', postId);
Delete
const { error } = await supabase
  .from('posts')
  .delete()
  .eq('id', postId);
Always handle the error return value. A common mistake is checking data before checking error — the error object tells you whether a query failed and why, including RLS policy violations.
Step 5: Authentication — Email/Password Signup and Login
Supabase Auth ships with pre-built flows for the most common authentication methods.
Sign Up
const { data, error } = await supabase.auth.signUp({
  email: 'user@example.com',
  password: 'securepassword123',
  options: {
    data: { full_name: 'Jane Smith' },   // stored in auth.users.raw_user_meta_data
  },
});
if (error) {
  console.error('Signup error:', error.message);
} else {
  console.log('User created:', data.user?.id);
}
By default, Supabase sends a confirmation email. The user is not considered active until the link is clicked. You can disable email confirmation in Authentication → Settings for development, but always enable it in production.
Sign In
const { data, error } = await supabase.auth.signInWithPassword({
  email: 'user@example.com',
  password: 'securepassword123',
});
if (data.session) {
  console.log('Logged in:', data.session.user.id);
}
Sign Out
await supabase.auth.signOut();
Listening to Auth State Changes
const { data: { subscription } } = supabase.auth.onAuthStateChange((event, session) => {
  if (event === 'SIGNED_IN') { /* update UI */ }
  if (event === 'SIGNED_OUT') { /* redirect to login */ }
});
// Clean up on component unmount
return () => subscription.unsubscribe();
Step 6: Next.js App Router Setup With @supabase/ssr
The single createClient approach works for React SPAs, but Next.js App Router has both server and client components, Server Actions, and middleware — each running in a different context with different cookie access. Supabase provides @supabase/ssr to handle this correctly.
npm install @supabase/ssr
Browser Client (Client Components)
// src/lib/supabase/client.ts
import { createBrowserClient } from '@supabase/ssr';
export function createClient() {
  return createBrowserClient(
    process.env.NEXT_PUBLIC_SUPABASE_URL!,
    process.env.NEXT_PUBLIC_SUPABASE_ANON_KEY!
  );
}
Use this in any 'use client' component. It reads and writes cookies in the browser, keeping the session in sync.
Server Client (Server Components, Route Handlers, Server Actions)
// src/lib/supabase/server.ts
import { createServerClient } from '@supabase/ssr';
import { cookies } from 'next/headers';
export async function createClient() {
  const cookieStore = await cookies();
  return createServerClient(
    process.env.NEXT_PUBLIC_SUPABASE_URL!,
    process.env.NEXT_PUBLIC_SUPABASE_ANON_KEY!,
    {
      cookies: {
        getAll: () => cookieStore.getAll(),
        setAll: (cookiesToSet) => {
          cookiesToSet.forEach(({ name, value, options }) =>
            cookieStore.set(name, value, options)
          );
        },
      },
    }
  );
}
Middleware for Session Refresh
Without middleware, a server component renders with a potentially expired session. Add src/middleware.ts to refresh the session on every request:
import { createServerClient } from '@supabase/ssr';
import { NextResponse, type NextRequest } from 'next/server';
export async function middleware(request: NextRequest) {
  let supabaseResponse = NextResponse.next({ request });
  const supabase = createServerClient(
    process.env.NEXT_PUBLIC_SUPABASE_URL!,
    process.env.NEXT_PUBLIC_SUPABASE_ANON_KEY!,
    {
      cookies: {
        getAll: () => request.cookies.getAll(),
        setAll: (cookiesToSet) => {
          cookiesToSet.forEach(({ name, value }) =>
            request.cookies.set(name, value)
          );
          supabaseResponse = NextResponse.next({ request });
          cookiesToSet.forEach(({ name, value, options }) =>
            supabaseResponse.cookies.set(name, value, options)
          );
        },
      },
    }
  );
  await supabase.auth.getUser();   // refreshes session if needed
  return supabaseResponse;
}
export const config = {
  matcher: ['/((?!_next/static|_next/image|favicon.ico).*)'],
};
This ensures that short-lived access tokens are refreshed server-side before your page renders, preventing flickering auth states.
Step 7: Row Level Security
Row Level Security (RLS) is PostgreSQL's mechanism for enforcing per-row access rules at the database level. With RLS enabled, even if a bug in your application code accidentally exposes a query, the database itself will only return rows the authenticated user is allowed to see.
Enable RLS on a table and add a policy in the Supabase SQL editor:
-- Enable RLS on the posts table
ALTER TABLE posts ENABLE ROW LEVEL SECURITY;
-- Users can only read their own posts
CREATE POLICY "Users can view their own posts"
  ON posts FOR SELECT
  USING (auth.uid() = user_id);
-- Users can only insert posts with their own user_id
CREATE POLICY "Users can insert their own posts"
  ON posts FOR INSERT
  WITH CHECK (auth.uid() = user_id);
-- Users can only update their own posts
CREATE POLICY "Users can update their own posts"
  ON posts FOR UPDATE
  USING (auth.uid() = user_id);
auth.uid() is a Supabase built-in that returns the ID of the currently authenticated user from the JWT. With these policies in place, a query for posts using the anon key will only ever return rows where user_id matches the logged-in user — regardless of what filters the application code passes.
Step 8: Real-Time Subscriptions
Supabase Realtime lets you subscribe to database changes using PostgreSQL's logical replication. Changes to any table — inserts, updates, deletes — are broadcast over a WebSocket to all subscribed clients.
const channel = supabase
  .channel('posts-changes')
  .on(
    'postgres_changes',
    { event: '*', schema: 'public', table: 'posts' },
    (payload) => {
      if (payload.eventType === 'INSERT') {
        setPosts(prev => [payload.new as Post, ...prev]);
      }
      if (payload.eventType === 'DELETE') {
        setPosts(prev => prev.filter(p => p.id !== payload.old.id));
      }
    }
  )
  .subscribe();
// Clean up on unmount
return () => { supabase.removeChannel(channel); };
Before subscriptions work, you must enable replication on the table in the Supabase dashboard under Database → Replication. Toggle the relevant tables on.
Step 9: File Uploads With Supabase Storage
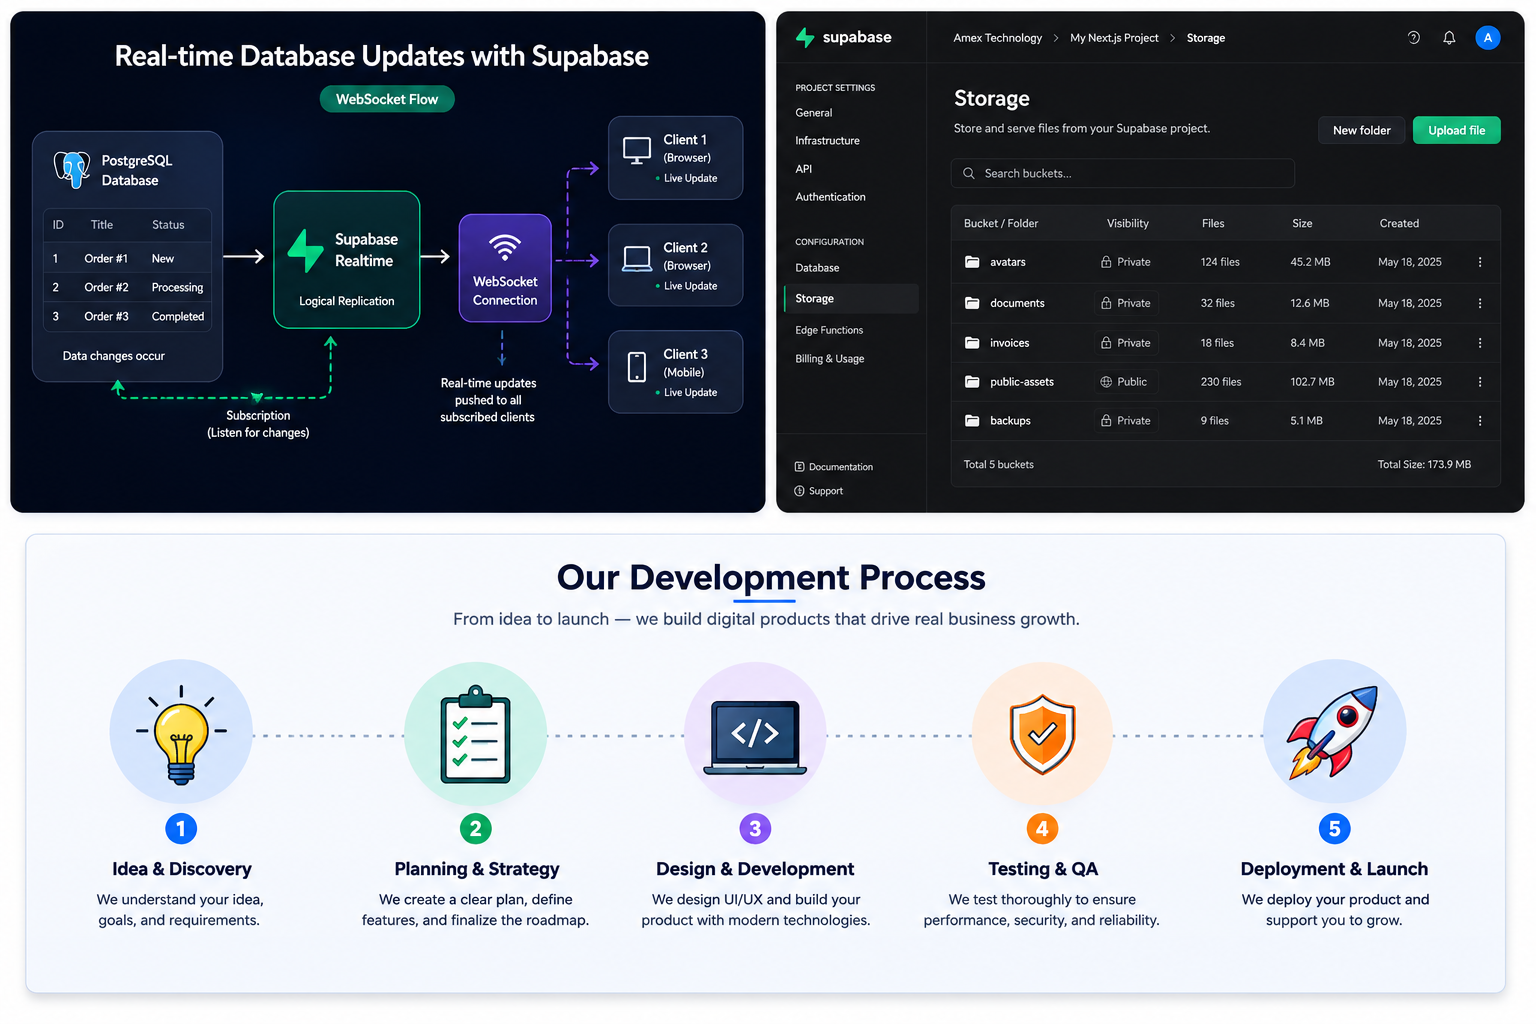
Create a storage bucket in Storage → New Bucket. Set it to private unless files need to be publicly accessible.
// Upload a file
const { data, error } = await supabase.storage
  .from('avatars')
  .upload(`${userId}/avatar.png`, file, {
    contentType: 'image/png',
    upsert: true,
  });
// Get a public URL (for public buckets)
const { data: { publicUrl } } = supabase.storage
  .from('avatars')
  .getPublicUrl(`${userId}/avatar.png`);
// Get a signed URL (for private buckets, valid for 1 hour)
const { data: { signedUrl } } = await supabase.storage
  .from('avatars')
  .createSignedUrl(`${userId}/avatar.png`, 3600);
Storage access is controlled by storage policies, similar in syntax to RLS. A common policy for user avatars: allow a user to upload and read files only under their own user_id path.
Common Mistakes
Using the Anon Key Server-Side Without RLS
The anon key is safe on the client because RLS limits what it can access. But if you use it in a Server Action or Route Handler without RLS enabled on your tables, every authenticated user can query every row — including other users' data.
Fix: Enable RLS on every table that contains user data. Use the Supabase dashboard's Advisors → Security tab to get a report of tables with RLS disabled.Not Refreshing the Session in Middleware
If you skip the middleware setup, server components render with a stale or expired session. The user appears logged out on the first server render even though their browser has a valid session cookie.
Fix: Add the middleware from Step 6 above. This is the most common source of "auth works in client components but not server components" confusion.Fetching Data in Client Components When Server Components Would Work
Many developers default to useEffect + Supabase client for all data fetching. In Next.js App Router, Server Components can fetch data directly without a loading state, waterfall, or client-side JavaScript.
Frequently Asked Questions
Is the anon key safe to commit to a public repository?The anon key is designed to be public — it identifies your project, not your access level. It's safe to expose it in client-side code. What makes it safe is RLS. Without RLS on your tables, the anon key grants full read/write access to all rows, which is why enabling RLS is non-negotiable for any production application.
What's the difference betweencreateClient from @supabase/supabase-js and from @supabase/ssr?
The base createClient stores the session in localStorage, which doesn't work in server environments. The @supabase/ssr variants (createBrowserClient and createServerClient) use cookies instead, enabling the session to be read by both browser and server code in Next.js.
Yes. The base @supabase/supabase-js client works in any JavaScript environment — Vite, Create React App, React Native, or plain HTML. The @supabase/ssr package is specifically for server-rendering frameworks like Next.js, Remix, and SvelteKit.
Supabase integrates with the Supabase CLI and supports migration files that you can version control alongside your application code. Run supabase db diff to generate a migration from schema changes, then supabase db push to apply it. For teams, this is the recommended approach over manually editing tables in the dashboard.
Yes. PostgreSQL has built-in full-text search using tsvector and tsquery. Supabase exposes this through the .textSearch() method on the query builder. For more advanced search (fuzzy matching, relevance ranking, multi-language), you can use the pg_trgm extension, which Supabase supports out of the box.
Build Production-Grade Supabase Applications With Amex Technology
Setting up Supabase correctly is the beginning. A production application needs a hardened schema with proper indexes, RLS policies that cover every access pattern, a migration strategy that works with CI/CD, and monitoring that alerts you when query performance degrades.
At Amex Technology, we design and build full-stack applications on the Next.js and Supabase stack — from schema design and RLS policy architecture to the deployment pipeline and observability layer. If you're starting a new project or scaling an existing one, we'd be glad to help you get it right from the foundation.
Explore our software development services, see our Portfolio, or get in touch to talk through your project.
Related Services
Need help building this?
Our team specializes in exactly this kind of work. Get a free quote and honest assessment within 24 hours.
Start a Project