
What Is Lovable and Why Would You Export?
Lovable is an AI-powered no-code builder that lets you describe a web application in plain English and get a working React app in minutes. For founders, designers, and product managers who want to move fast without a full engineering team, it's a genuinely powerful way to go from idea to functional prototype.
But at some point, most Lovable users hit a wall. You need a custom integration that Lovable's interface doesn't support. You want to hand the codebase off to a developer for production hardening. You want to self-host the app on your own infrastructure instead of Lovable's platform. Or you need to add authentication flows, payment processing, or backend logic that goes beyond what the visual editor can produce.
That's when exporting the code becomes essential. The good news: Lovable generates real code — not some proprietary format — and getting it out is straightforward once you know the steps.
The Stack Lovable Generates
Before you export, it helps to know what you're getting. Lovable generates a standard modern React application with the following stack:
- React — the UI component library (the same React used by millions of developers worldwide)
- Vite — a fast, modern build tool that replaces the older Create React App setup
- Tailwind CSS — a utility-first CSS framework for styling
- shadcn/ui — a component library built on Radix UI, giving you accessible, polished UI primitives
- Supabase — an open-source Firebase alternative for database, authentication, and storage (if your app uses a backend)
This is a legitimate, production-capable tech stack. A developer who knows React can pick up a Lovable export and continue building without needing to learn any proprietary tools.
Method 1: Connect to GitHub via Lovable Settings
The cleanest way to export is by connecting your Lovable project directly to GitHub. This gives you a proper version-controlled repository rather than a one-time ZIP snapshot.
Step 1: Open Your Project Settings
In your Lovable editor, click on the project name or the settings icon in the top bar. This opens the project settings panel on the right side of the screen.
Step 2: Find the GitHub Integration
In the settings panel, look for the GitHub section. If you haven't connected GitHub before, you'll see a Connect to GitHub button. Click it and authorize Lovable to access your GitHub account via OAuth. Grant the permissions Lovable requests — it needs permission to create and push to repositories.
Step 3: Create and Push the Repository

Once connected, give your repository a name and select whether it should be public or private. Click Push to GitHub. Lovable will initialize a Git repository from your project and push all the generated code to a new GitHub repo under your account.
Visit your GitHub profile to confirm the repository exists. You should see all the files — the src/ directory, package.json, vite.config.ts, tailwind.config.ts, and more.
Going forward, changes you make in the Lovable editor can be synced back to GitHub with a single click from the same settings panel.
Cloning the Repo and Running Locally
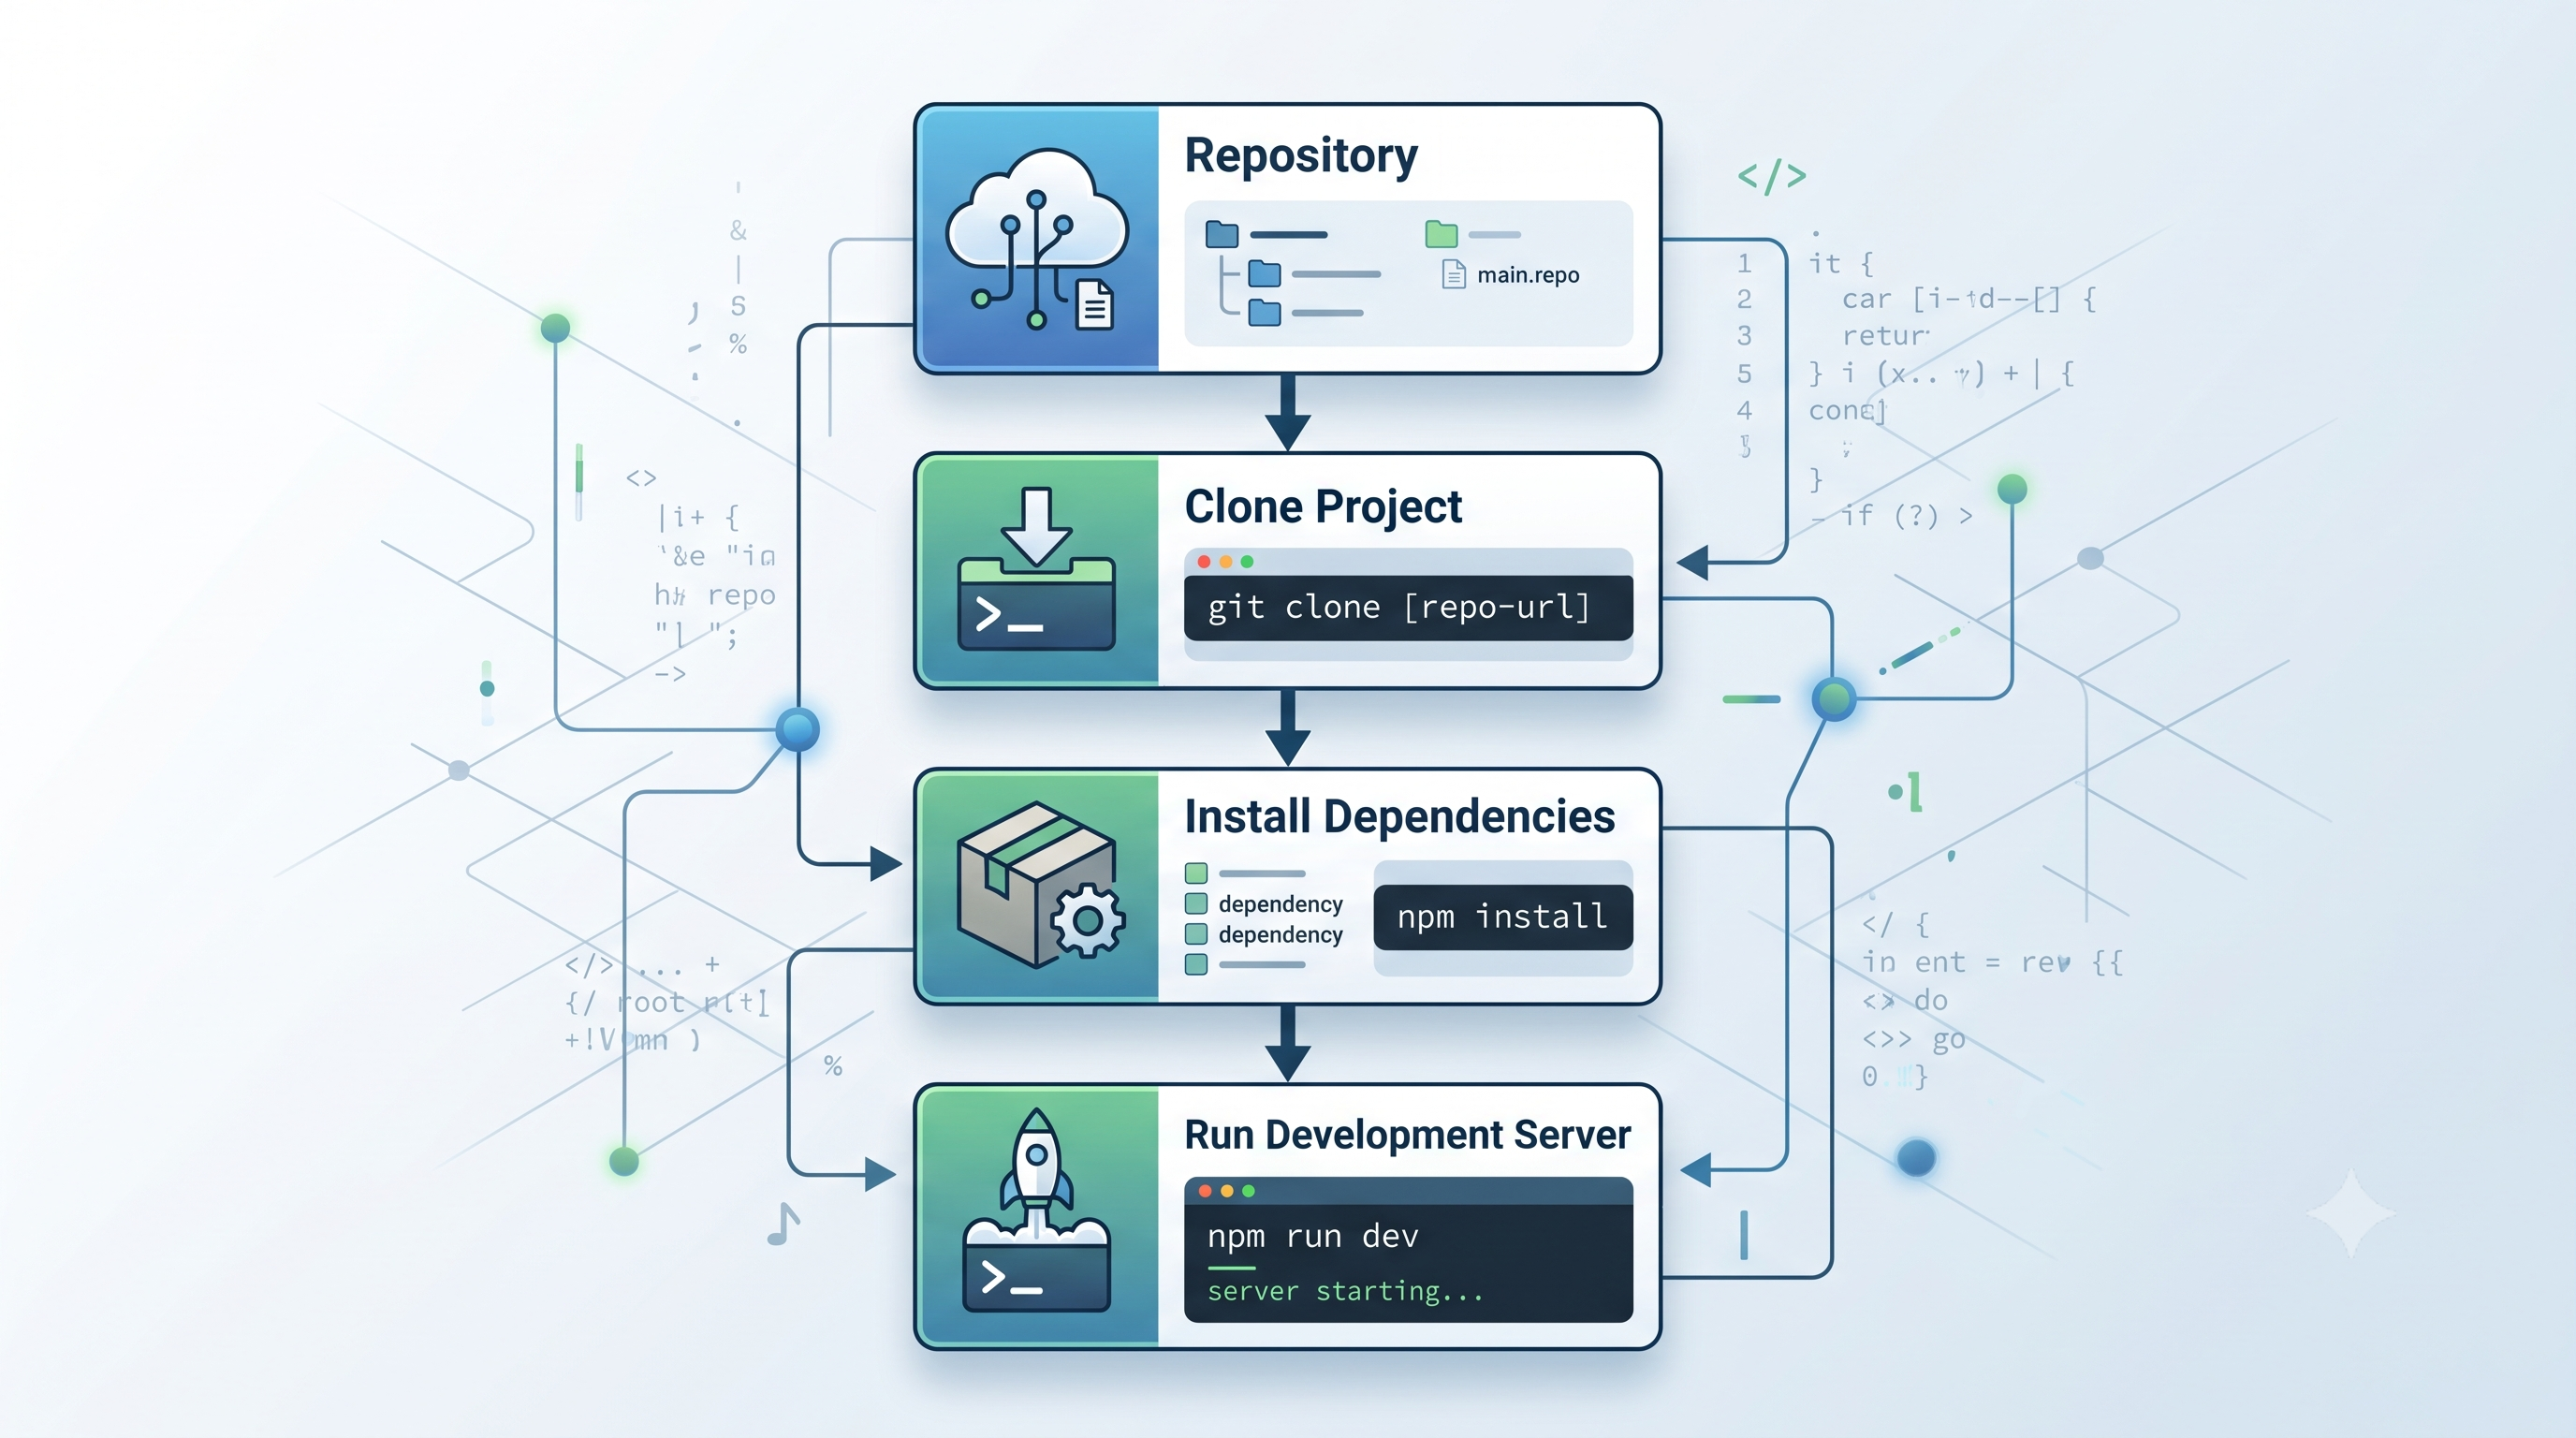
With your code on GitHub, getting it running locally takes four commands.
Clone the Repository
git clone https://github.com/your-username/your-repo-name.git
cd your-repo-name
Replace your-username and your-repo-name with your actual GitHub username and the repository name you set in Lovable.
Install Dependencies
npm install
This reads package.json and installs all the required packages into a local node_modules/ directory. The first install may take a minute or two.
Start the Development Server
npm run dev
Vite will start a local development server, usually at http://localhost:5173. Open that URL in your browser — you should see your Lovable app running locally, identical to how it appeared in the Lovable editor.
Understanding the Project Structure
A Lovable export has a clean, conventional structure:
src/
  components/       — React UI components
  pages/            — Top-level route components
  hooks/            — Custom React hooks
  lib/              — Utility functions and config
  integrations/     — Supabase client setup
public/             — Static assets
package.json        — Dependencies and scripts
vite.config.ts      — Vite build configuration
tailwind.config.ts  — Tailwind CSS configuration
The components folder is where you'll spend most of your time as a developer. Each component Lovable generated corresponds to a visible section of your UI.
Environment Variables: What Lovable Stores vs What You Recreate
This is the most common stumbling block when running a Lovable export locally. Lovable's platform securely stores your environment variables (like your Supabase project URL and anon key) and injects them at build time. When you export the code, those values are not included — you need to recreate them yourself.
Create a .env.local file in the root of your project:
touch .env.local
Add your Supabase credentials (find these in your Supabase project dashboard under Settings → API):
VITE_SUPABASE_URL=https://your-project-id.supabase.co
VITE_SUPABASE_ANON_KEY=your-anon-key-here
Note the VITE_ prefix — this is how Vite exposes environment variables to the client-side code. Any variable without this prefix will be invisible to your React components.
Add .env.local to your .gitignore if it isn't already there. Never commit credentials to version control.
Deploying the Export to Vercel
Once the app runs locally, deploying to Vercel takes under five minutes.
- Push your code to GitHub (if you've made any local changes)
- Go to vercel.com and click Add New Project
- Import your GitHub repository
- In the Environment Variables section, add
VITE_SUPABASE_URLandVITE_SUPABASE_ANON_KEYwith the same values as your local.env.local - Click Deploy
Vercel automatically detects the Vite framework and configures the build settings correctly. Your app will be live at a .vercel.app URL within two minutes. Connect a custom domain from the Vercel project settings when you're ready.
What You Can Customize Post-Export
Once you have the code locally, you're no longer limited by what Lovable's editor supports. Common post-export customizations include:
Custom API routes — Add a backend with serverless functions using Vercel Edge Functions or a separate Express/Hono API server. Advanced authentication — Replace the basic Supabase auth setup with custom flows: magic links, social OAuth, SSO, or role-based access control enforced at the row level in Supabase. Third-party integrations — Add Stripe for payments, Resend for transactional email, Posthog for analytics, or any other npm package that wasn't available in Lovable's interface. Performance optimization — Add code splitting, lazy loading, image optimization, and caching headers that aren't configured in the default export. CI/CD pipeline — Set up GitHub Actions to run type checking, linting, and tests on every PR before merging.Common Issues and Fixes
Missing Environment Variables Cause a Blank Screen
If you open http://localhost:5173 and see a blank page or console errors like undefined is not an object, the most likely cause is missing Supabase credentials.
.env.local exists in the project root, that the variable names start with VITE_, and that you restarted the dev server after creating the file (npm run dev needs to be restarted to pick up new .env.local values).
Supabase Connection Errors
If you see errors like Failed to fetch or NetworkError in the console when the app tries to load data, your Supabase project may have Row Level Security (RLS) policies that block anonymous access.
SELECT for the anon role on the relevant tables.
npm install Fails With Peer Dependency Errors
Lovable may have used a Node.js version with a specific npm behavior. If npm install throws warnings about peer dependencies, try:
npm install --legacy-peer-deps
Or install and use the Node version specified in the project's .nvmrc or package.json engines field if one is present.
Frequently Asked Questions
Does exporting from Lovable cost anything?Exporting to GitHub is available on Lovable's paid plans. Check Lovable's current pricing page for the exact tier that includes GitHub export — it's typically included in the Pro plan.
Will my Lovable app keep working after I export?Yes. Exporting the code to GitHub doesn't remove or disable your Lovable project. Both the Lovable-hosted version and your exported copy exist independently. You can continue editing in Lovable and syncing to GitHub as needed.
Can a developer continue building in Lovable after I export?Yes. Because Lovable pushes to a real GitHub repo, a developer can clone the repo, work locally in VS Code or any editor, and push changes back to GitHub. The Lovable editor can also pull those changes back in (with some limitations on heavily customized code).
Do I need to keep paying for Lovable after I self-host?No. Once you've exported the code and deployed it to your own infrastructure, your app runs independently of Lovable. You only need an active Lovable subscription if you want to continue using the AI editor to make changes.
What's the difference between the Lovable export and a Bolt.new or v0.dev export?All three generate React code you can export. Lovable's exports tend to be more complete full-stack applications with Supabase integration. Bolt and v0.dev are stronger for UI prototypes. The underlying React/Vite/Tailwind stack is similar across all three.
Take Your Lovable Prototype to Production With Amex Technology
Exporting from Lovable is the bridge between a fast prototype and a production application. But the gap between "it works locally" and "it scales reliably with real users" is significant — it involves production database optimization, proper auth hardening, CI/CD pipelines, monitoring, and deployment infrastructure.
At Amex Technology, we specialize in taking Lovable and other no-code prototypes and turning them into production-grade applications. Whether you need a developer to extend your exported codebase, a team to rebuild it on a more scalable architecture, or help setting up the deployment and monitoring infrastructure, we can help.
Explore our software development services, see our Portfolio, or get in touch to talk through your project.
Related Services
Need help building this?
Our team specializes in exactly this kind of work. Get a free quote and honest assessment within 24 hours.
Start a Project